


What is the Best Process for New Window Installation Prep?
For new window installation prep, you should: establish a 3-to-5-foot clear perimeter around all interior window frames, remove all blinds, drapes, and mounting hardware, and take down artwork, mirrors, and electronics from surrounding walls to prevent vibration damage. Outside, trim back foliage by at least 3 feet, clear walkways, unlock perimeter gates, and place security alarm systems on “test” mode. Designate a flat staging area (such as a garage or driveway) and secure household pets in an isolated room with food, water, and closed doors.
Upgrading residential building envelopes with precision-engineered fenestration is one of the most effective ways to lower household energy consumption and enhance structural aesthetics.
Executing proactive, comprehensive site preparation ensures field technicians work efficiently, safely, and without delay, while safeguarding your architectural finishes, custom interior decor, and outdoor landscaping.

Interior Site Preparation: Establishing Operational Perimeters and Vibration Controls
Precision window retrofitting requires unhindered interior access. Heavy-gauge, multi-chambered vinyl extrusions and multi-pane insulated glass packages demand balanced, two-person handling from transport vehicles directly into the rough framing.
Homeowners must establish an unobstructed workspace long before the installation fleet arrives.
- Clear a 3-to-5-Foot Primary Perimeter: Move all freestanding furniture—including sofas, armchairs, credenzas, floor lamps, and desks—away from interior sills, jambs, and stool boards. Installers need ample floor space to maneuver 6-foot levels, impact drivers, reciprocating tools, and framing shims.
- Remove Window Coverings Completely: Strip away drapes, sheer curtains, motorized roller shades, vertical blinds, plantation shutters, and external mounting hardware. Leaving brackets in place risks bending the metal hardware and blocks the square alignment of newly inserted frames.
- Establish Haul Pathways: Open clear passage through front entries, hallways, stairwells, and primary rooms. Remove hallway runners, decorative plant stands, and entryway tables that could impede technicians carrying cumbersome glass assemblies.
- Protect Floor Coverings: Lay heavy-duty canvas drop cloths or self-adhering protective poly films over hardwood, natural stone tile, and wall-to-wall carpeting to catch microscopic construction dust, old sealant flakes, and abrasive stucco grit.
Mitigating Structural Framing Reverberations
Extracting legacy aluminum, steel, or decayed wood frames requires oscillating multitools, pry bars, and reciprocal saws. The mechanical forces applied to rough structural studs inevitably transmit vibration waves through drywall, plaster, and interior partition walls.
To protect household heirlooms and architectural features:
- Strip Adjoining Walls: Remove hanging canvas paintings, floating display shelves, framed prints, and mirrors from any wall receiving a window replacement.
- Clear Perpendicular Partitions: Reverberations travel around corners through shared structural studs. Remove wall decor mounted on adjacent partitions up to 8 feet away from the workspace.
- Store Loose Collectibles: Remove loose ceramics, porcelain, crystal stemware, and valuable knickknacks from mantels, bookcases, and open display cabinetry.
- Isolate Sensitive Electronics: Wrap desktop monitors, entertainment consoles, and audio components in clean dust sheets or temporarily relocate them to unaffected rooms.
- Seal Off Inactive Living Zones: Close interior doors to bedrooms, home offices, and guest rooms not scheduled for retrofitting to contain airborne plaster, drywall, and insulation dust.
Planning room prep alongside your custom window manufacturing timeline ensures that the unique architectural profiles, interior woodgrain finishes, and high-performance glass units specified for your home arrive at an interior workspace ready for immediate, frictionless installation.
Exterior Site Logistics, Landscaping Protocols, and Sensor Isolation
The exterior perimeter is where structural flashing is seated, outer brickmould or nail-fins are prepped, low-expansion polyurethane foam is injected, and commercial-grade exterior elastomeric caulking is applied. Ensuring clean, level, and unobstructed exterior access is critical for structural waterproofing and worker safety.
- Prune Foundation Vegetation: Trim tree limbs, foundation shrubs, and climbing vines back at least 3 to 4 feet from exterior walls to ensure technicians can position ladders and work platforms flush against the structure.
- Level Work Platform Clearances: Remove garden borders, edging stones, and organic mulch heaps that create uneven grading beneath ground-floor and second-story window banks.
- Relocate Patio Infrastructure: Move outdoor lounge chairs, dining tables, portable fire pits, barbecue units, and potted planters away from exterior walls, decks, and balconies.
- Stow Ground Hazards: Coil garden hoses, disconnect drip irrigation lines, and store extension cords, children’s play structures, and landscaping tools.
- Unlock Access Portals: Unlock side gates, pool enclosures, and breezeway entrances so technicians can transition freely between transport trucks, outdoor staging areas, and interior rooms.
Decommissioning Smart Home and Integrated Alarm Contacts
Modern properties across California rely on integrated home automation systems, hardwired security switches, and perimeter intrusion alarms. These systems must be deactivated and disconnected before physical frame extraction begins to avoid costly damage to delicate circuitry.
- Notify Monitoring Stations: Contact your security provider 48 hours in advance to place your account into extended “Test Mode,” preventing false alarms and accidental municipal emergency dispatches.
- Dismantle Surface Hardware: Carefully remove magnetic reed sensors, surface-mounted contact transmitters, hardwired glass-break detectors, and external solar screens from existing frames and window sills.
- Isolate Hardwired Alarm Lines: If existing frames house concealed security wires, identify whether the wires pass through the jambs. Tuck these wires securely into wall cavities so they are not severed during saw-cutting operations.
- Shut Down Exterior Utilities: Turn off automated exterior sprinkler timers and hose spigots near active zones to eliminate slip hazards, mud tracking, and accidental equipment wetting.
- Relocate Video Hardware: Temporarily remove perimeter security cameras, floodlights, or motion sensors if they overlap with the swing radius of long ladders or staging zones.
Microclimate Dynamics: California Regional Environmental Readiness
| California Microclimate Region | Dominant Atmospheric & Environmental Stressors | Necessary Site Preparation & Installation Safeguards | Critical Material & Engineering Countermeasures |
|---|---|---|---|
| Southern California Coastal (e.g., Santa Monica, Newport Beach, San Diego) | Salt-laden marine aerosols, persistent morning fog, high relative humidity, coastal dampness.[cite: 27] | Wipe down exterior stucco perimeters; clear side yards of coastal moisture collectors; allow morning dew to burn off before applying outer sealants.[cite: 27] | 100% pure virgin vinyl extrusions (corrosion-proof); high-grade marine sealants; non-corrosive stainless steel hardware packages.[cite: 27] |
| Inland Empire & San Gabriel Valley (e.g., Riverside, San Bernardino, Pasadena) | Intense summer solar irradiation (100°F+ temperatures), extreme thermal cycling, dry Santa Ana wind events.[cite: 27] | Cover exposed interior flooring against high afternoon UV exposure; hydrate staging zones; establish shaded material cooling areas.[cite: 27] | Spectrally selective triple-silver Low-E coatings; multi-chambered frame air pockets to arrest conductive thermal gain; high-durability UV stabilizers.[cite: 27] |
| San Francisco Bay Area & Peninsula (e.g., Oakland, San Jose, San Mateo) | Rapid microclimate swings, shifting fog banks, cool wind drafts, dense urban acoustic pollution.[cite: 27] | Establish wind barriers on windward exposures; protect historic interior moldings from moisture condensation during rough opening exposure.[cite: 27] | Sound Transmission Class (STC)-rated acoustic laminate glass; warm-edge structural foam spacers; airtight compression weatherstripping.[cite: 27] |
| Central Valley Agricultural Corridor (e.g., Fresno, Bakersfield, Modesto) | Heavy airborne dust, particulate matter, wide diurnal temperature swings, seasonal Tule fog.[cite: 27] | Seal interior doors with masking tape to keep out exterior particulates; keep drop cloths wet or use sticky mats at entry portals.[cite: 27] | High-density expanding closed-cell foam fills; dual continuous compression bulb seals; multi-pane argon gas insulation.[cite: 27] |

Planning your custom window replacement with hyper-local environmental factors in mind ensures your home maintains an airtight seal and superior acoustic performance, regardless of local weather shifts.
Operational Logistics: Material Staging and Pet Safety Protocols
High-performance fenestration projects require organized staging areas to sort glass units, structural shims, backer rods, flashing tapes, and pneumatic fasteners. Designating these staging locations before installation begins keeps the job site clean and avoids project bottlenecks.
Establishing Staging Infrastructure
- Select a Level Surface: Designate a flat, dry, covered exterior space—such as a multi-car garage, covered carport, or large sheltered patio. Insulated glass units must remain vertical on flat, solid surfaces to prevent edge-seal stress.
- Reserve Driveway Clearances: Reserve 35 to 40 linear feet of open curb or driveway space for installation transport trucks. This ensures the delivery crew has direct, level access to unload heavy assemblies.
- Manage Community Access: If your home is part of a homeowners association (HOA) or features a shared private drive, alert property managers and neighbors 72 hours before delivery to reserve parking lanes and clear access corridors.
- Relocate Family Vehicles: Move all personal vehicles out of garages and driveways before the installation crew arrives at 8:00 AM, avoiding disruptions during active delivery and staging cycles.
Pet Safety and Containment Procedures
Open exterior doors, active tool handling, and oscillating noise can cause significant stress to domestic animals. A frightened pet may bolt through an unlatched gate or open structural frame, risking injury or loss.
- Designate an Isolated Comfort Room: Place dogs, cats, and small animals in an interior room away from retrofitting zones—such as an upstairs guest bedroom or a climate-controlled utility area.
- Equip the Sanctuary: Provide familiar bedding, crate setups, food bowls, fresh water, and a white noise machine or low-volume radio to mask installation sounds.
- Post Clear Warning Signage: Place prominent signs on the outside of closed doors: “DO NOT OPEN – PETS INSIDE.”
- Schedule Supervised Breaks: Coordinate mid-day bathroom breaks for dogs on leashes, escorting them safely away from active construction perimeters.
- Enforce Post-Work Sweeps: Keep pets isolated until the installation team completes its final magnetic sweep, which collects dropped staples, screws, nails, and sharp aluminum cuttings from rugs and lawns.
Installation Mechanics: Factory-Direct Systems vs. Subcontracted Broker Models
Homeowners often debate whether to work directly with a vertically integrated manufacturer-installer or source products through third-party retail dealers and subcontracted crews. Understanding these operational differences clarifies why direct manufacturer oversight ensures higher installation quality and accountability.
Delivery Staging, Pre-Installation Verifications, and Quality Sign-Off
When our installation trucks arrive, our lead field supervisor will conduct a structured pre-installation review with you before dismantling any existing windows:
- Verify Window Specifications: Cross-check delivered window models against your project work order, confirming operational styles (e.g., horizontal sliders, casements, tilt-turn configurations, geometric picture units).
- Confirm Glass Package Features: Verify low-emissivity coating applications, warm-edge structural spacer alignments, argon gas fills, and Sound Transmission Class (STC) ratings via product certification labels.
- Inspect Aesthetic Treatments: Confirm frame finishes, multi-point lock configurations, cam-lock alignments, balance systems, and integrated grid patterns.
- Audit Floor Coverings: Verify that drop cloths, floor runners, and corner-wall protections are securely deployed along all haul routes.
The Post-Installation Architectural Walkthrough
Once structural leveling, non-expanding thermal insulation, trim flashing, and exterior elastomeric seals are completed, you will perform a room-by-room walkthrough alongside our project lead:
- Verify Level, Plumb, and Square: Confirm that frames are set true within the rough opening, ensuring even sightlines across all four corners.
- Inspect Sashes and Tracks: Confirm that sliding sashes glide smoothly across low-friction tracks, casement operators cycle effortlessly without binding, and double-hung hardware balances accurately.
- Inspect Weatherseals: Check that continuous perimeter compression seals meet evenly at corners, forming an airtight barrier against drafts, dust, and outdoor noise.
- Review Hardware and Screens: Test security latches, tilt latches, child safety locks, and screen tabs to ensure smooth, secure operation.
- Approve Clean-Up and Site Condition: Verify that protective tape is removed, glass surfaces are clean, old window assemblies are loaded onto haul-away trucks, and work zones are free of debris.
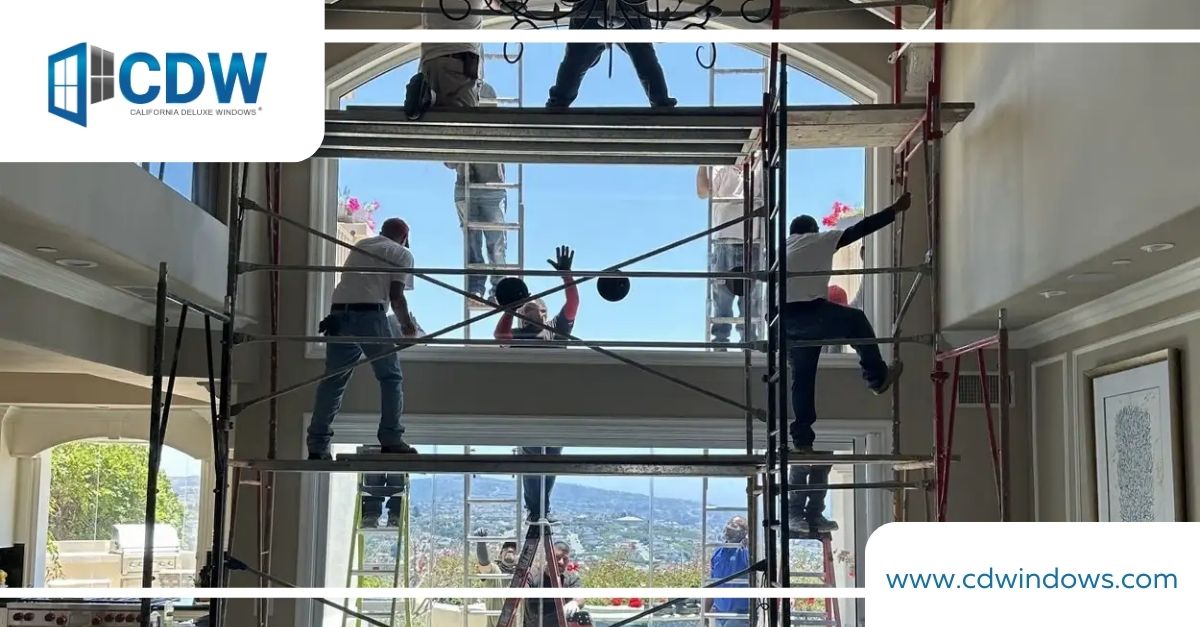
Frequently Asked Questions About New Window Installation Prep
What exact physical clearance is required around each window opening?
Installers need a continuous, unobstructed perimeter of 3 to 5 feet inside the room and at least 3 to 4 feet of exterior clearance. This clear space allows technicians to safely maneuver heavy insulated glass units, position step ladders, operate long levels, and run power tools without damaging your walls, trim, or personal belongings.
How do I protect interior walls and valuable heirlooms from tool vibration?
Remove all mirrors, artwork, wall clocks, and floating shelves from the walls being worked on, as well as from adjacent perpendicular partition walls. Framing vibrations generated by reciprocating saws and extraction pry bars pass easily through structural studs. Fragile collectibles, china, and delicate glassware should be safely packed away from mantels and display cases for the duration of the installation.
Do I need to remove my own window treatments and blinds?
Yes. All curtains, heavy fabric drapes, vertical blinds, motorized roller shades, plantation shutters, and mounting brackets must be fully removed before the installation crew arrives. Leaving treatments or brackets in place obstructs the extraction of old frames and prevents installers from plumbing and squaring your new units.
What should I do with my home security sensors before window retrofitting?
Contact your security alarm monitoring provider 48 hours before work begins to place your system on extended “Test Mode.” Next, carefully remove surface-mounted contact sensors, magnetic switches, and glass-break transmitters from existing frames and glass panes. Once your new window installation is complete, have your alarm technician remount and calibrate your hardware to maintain your warranty and avoid frame damage.
Where should I contain pets during the installation process?
Secure your pets in a quiet, isolated room far from active workspaces—such as a remote upstairs bedroom or a climate-controlled utility space. Provide them with food, fresh water, familiar bedding, and gentle background noise to reduce stress. Place a clear warning sign on the door instructing workers to keep it closed, and keep pets inside until the crew finishes its final magnetic sweep for dropped fasteners and debris.
Taking the time to organize interior rooms, trim exterior landscaping, and establish dedicated staging zones ensures your installation proceeds safely and efficiently. Through thorough site preparation and the skilled craftsmanship of direct-factory specialists, your home upgrade will deliver superior thermal comfort, quiet interiors, and long-term energy savings for decades to come.